Making your own escape room for the classroom is a great way to engage your students. Escape room games are so much fun and they add another layer of learning by encouraging important skills such as critical thinking and collaboration. Students work together in small groups to solve a series of puzzles to reach a particular goal. They are the ideal educational games for developing communication skills too. The great thing about an escape room activity is that student engagement is high throughout the task. Escape games really do hold students’ attention! All you need are some clues, envelopes to hide them them in and a goal to aim for! Read on as I take you through each stage of the creation process step by step.

Firstly, let’s look at the benefits of using escape rooms in the classroom. Escape room challenges:
- Promote critical thinking and problem solving skills
- Immerse students within the game
- Develop collaboration skills
- Help build classroom community
- Are motivational
- Encourage resilience
- Embed skills in a fun and engaging way
So, what are you waiting for? Let’s get started and create your own escape room for the classroom.
1. Identify the learning objectives
To begin, identify the objectives or skills you want your students to address. This could be anything from 2-digit addition, to close reading skills to properties of materials. The possibilities are endless! You can create an escape room for pretty much any objective you need to teach your students.
2. Decide on an classroom escape room theme
This is the fun part! When thinking about escape room ideas, your theme could be seasonal, for example based around Halloween, Christmas, or summer, or it could be something that could be played all year round such as space, detectives, dinosaurs or treasure maps. You could even base it around a novel you are studying as a class. It could also be based on a historical era, for example Romans or medieval castles.
3. Set the scene
Once you have chosen your theme, decide on the ultimate goal the students have to achieve. This could be an ‘escape’ but it doesn’t have to be, you could bend the rules here! Maybe the goal is to escape from a haunted house, find hidden treasure or fix Santa’s sleigh and escape the North Pole on Christmas Eve. Now that you have your end goal decided, set the scene. Present students with a letter introducing the problem and what they need to do to solve it. This could even be written from a character. For example, a letter from Santa telling students that his sleigh is broken and he needs their help to fix it so he can deliver presents on Christmas Eve, for example. Instead of a letter, you could even record a video to play students.
4. Decide on your escape room structure
You can structure your escape room in any way your wish, but I love to have the solution to each clue lead to the location of the next clue. This could be a typical classroom object, such as a book case or tap, for example. I love to use posters which I put up around the room of locations related to the theme. For example, in a haunted house theme, I would use posters of a cauldron or spider web etc. To show the possibilities of where the next clue may be hidden. A scavenger-hunt style escape room is great fun where students go to the actual location and collect the next clue, hidden in an envelope, but this is not essential and you can hand the clues to the students when they give you the correct answer. Check out my blog post with more ideas on how to organise classroom escape room clues.
I also think it is great for students to work in teams of around 4-5. They can work together, use the strength of the individual team members and develop their collaboration skills. You could even assign each team member a role, for example, clue reader, clue collector, answer recorder etc.

5. Create your clues
I like to typically have around 5 to 6 clues. These are a series of puzzles based on the initial learning objectives, so these could be sums to solve, information in a reading passage to identify, matching a material to its properties. Then I use the answers to somehow reveal the location of the next clue. This could be by turning the numbers to math problems to letters using a code which spells out a word, using a maze or tangle puzzle from the correct answer in a multiple choice question to the next clue location or highlighting particular letters in the question to spell out the next location, i.e. read only the highlighted letters in the math problem questions that have an answer over 30. This is your chance to really be creative!
Some ideas for puzzles include:
- Codes and ciphers
- Mazes
- Jigsaw puzzles that reveal a picture
- Riddles
- Unscrambling letters
- Locks and keys
- Combination locks
In each envelope with the next clue I also place something to collect, such as a key. This key has a symbol on which can only be decoded once all the keys have been collected from all the clues. Once decoded this is the location of the final step in the puzzle. i.e. where the treasure chest is hidden, where the fairy dust is to start Santa’s fixed sleigh, for example.
6. Use a timer
Add an extra layer of challenge with a timer. This adds extra motivation to complete the challenge. This could be displayed on an interactive white board, if you have one. Give the students count down reminders, i.e. 30 minutes to go, 10 minutes to go etc. The first time you do an escape room with your students, give them longer than you think it will take to give all the students the opportunity to be successful. Read my ideas on how to differentiate classroom escape rooms.
7. Celebrate
On the very final location, I hide a certificate in the envelope congratulating the students on completing the escape room. This is fun way to round off the challenge and praise the students on their hard work!
8. Go digital with a Google Forms classroom escape room
Instead of using the traditional paper based or scavenger hunt style escape room, there is also the option to create your own virtual escape rooms using Google Forms. When you set up your clues using Google Forms, set them so that you cannot progress to the next clue until students enter the correct answer. This is the perfect self-checking option. Students can still work in teams solving the clues, but provide each team with one device to enter their answers into. This is also perfect for distance learning. Read my step-by-step guide on how to make an escape room using Google Forms or if you’re just getting started, learn how to set up Google Classrooms.
If you’d like to save yourself the time of creating your own digital escape room, I have created my own Second Grade Math Escape Rooms for you! These are perfect if you are trying out your first escape room for the classroom. Click on the images below to find out more.
 |  | 
|
 |  |  |
 |
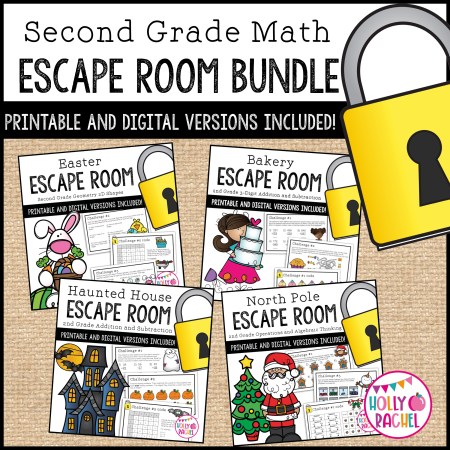
These escape rooms cover many Second Grade Math CCSS. My Halloween Haunted House Escape Room covers 2-digit addition and subtraction. My fun Christmas North Pole Escape Room covers operations and algebraic thinking. There is also an Easter Escape Room covering 2D Shape and finally a Bakery-themed Escape Room covering 3-digit addition and subtraction skills. All the escape rooms come in printed paper form with the option for a scavenger-hunt style game, as well as a Google Forms digital version. You can also save $$ when purchasing as a bundle. Grab the Second Grade Math Escape Room Bundle now!
So why not give it a go and try out a classroom escape room? You’ll be thrilled at your students’ response!